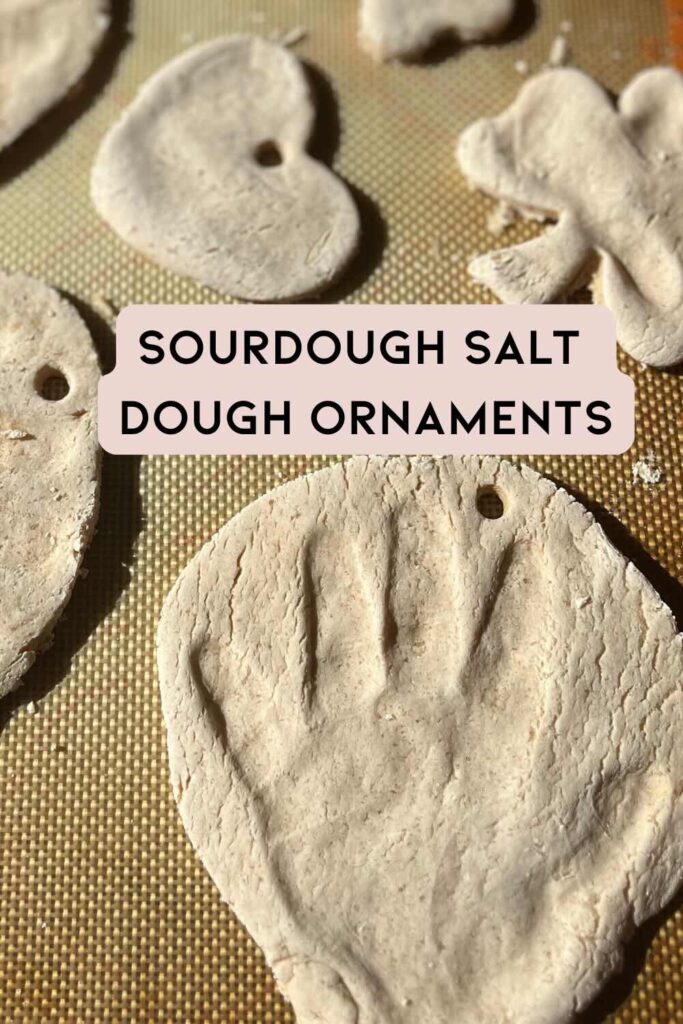
Make these sourdough salt dough ornaments to ring in the holiday season. Made with sourdough starter, salt, flour and water, these could not be any easier! They are a fun craft to do with little kids (and a good time capsule)!
Jump to Recipe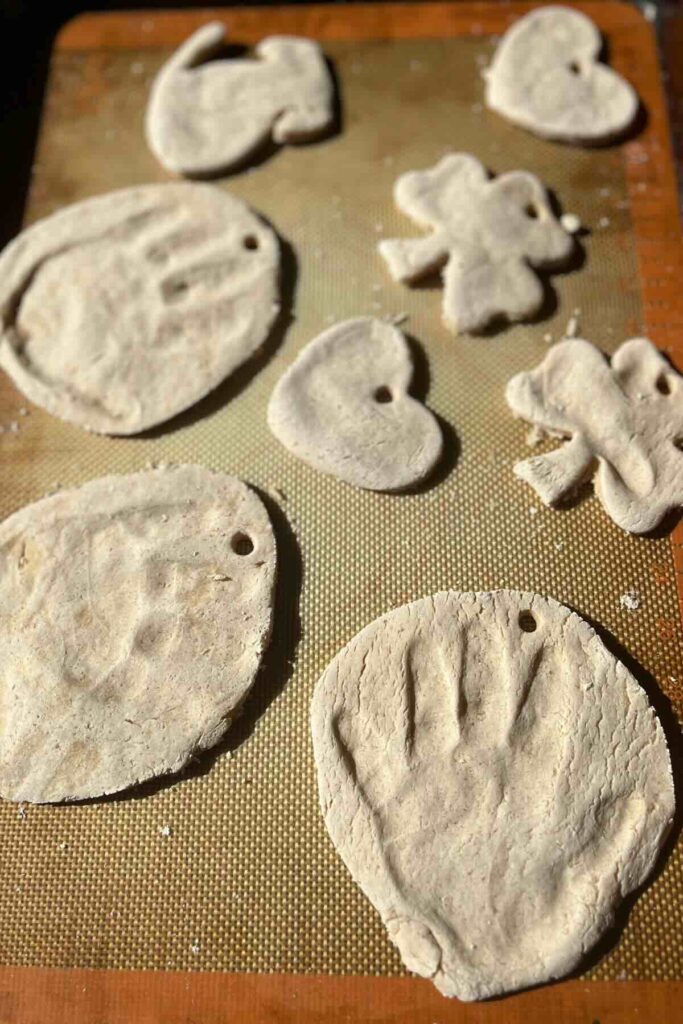
If you are looking for a fun project to do with your little ones, try making homemade salt dough ornaments. Similar to play dough, this salt dough recipe brings hours of fun creating new designs and decorating the ornaments.
As a child, I remember making cinnamon ornaments with cinnamon, applesauce and glue. I also remember making beautiful salt dough ornaments in art class. They were hung on the Christmas tree or displayed on the fridge all holiday season long.
Now, I love making memories like these with my little ones. It is a great way to make a time capsule, (especially of the salt dough handprint ornaments)!
These simple ornaments are such an easy activity which make perfect holiday gifts. Better yet, they are an inexpensive homemade gift which can be designed and decorated in many different ways.
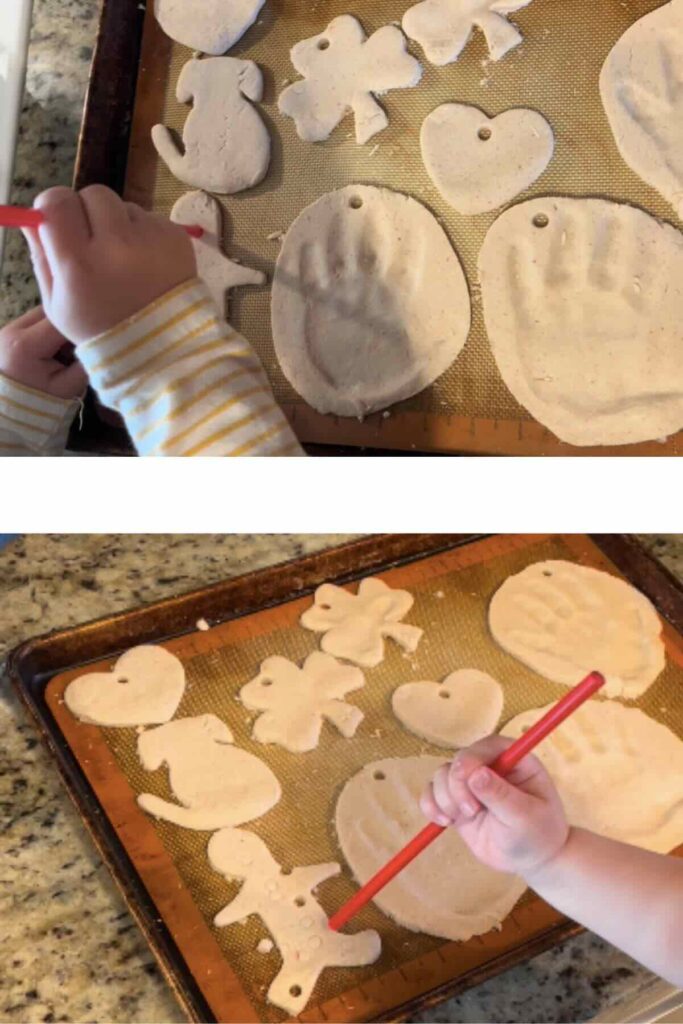
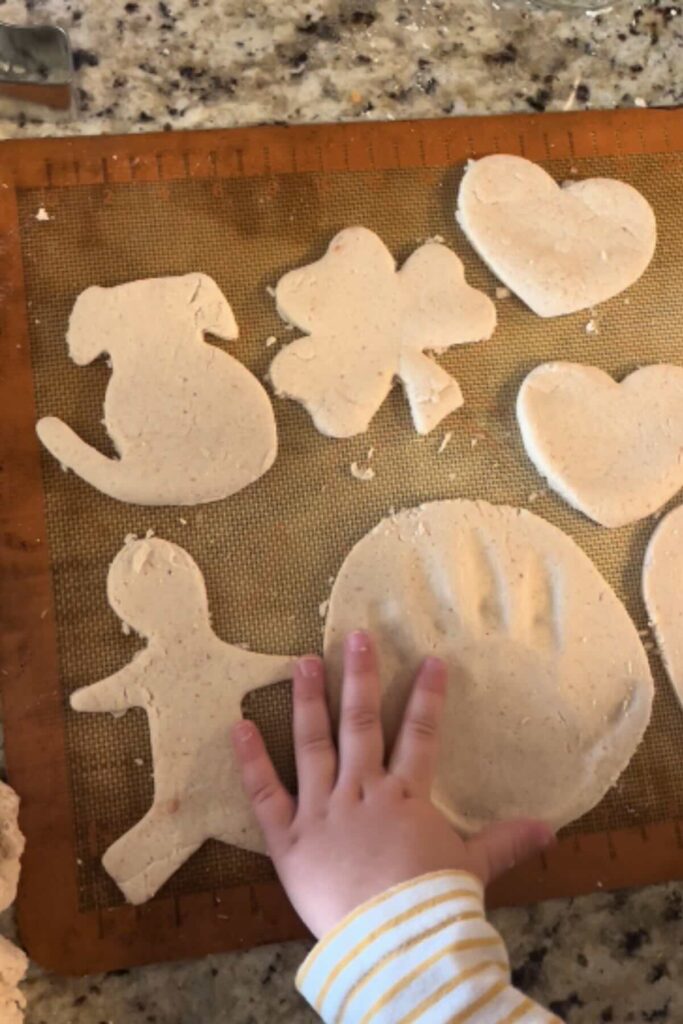
Whether you use stamps, cookie cutters, a biscuit cutter, handprints or even play dough tools, the creativity is endless. After these sourdough salt dough ornaments are dried they can be left plain and covered in a clear coat of mod podge or decorated with glitter or paint.
It is easy for all ages of the family to hop in on this arts and craft time. And smiles will be brought for years to come with these homemade ornaments.
Why you will love this craft
Kitchen Tools
Keep this recipe simple and have fun kneading the sourdough salt dough by hand! Equipment we used included a large mixing bowl, rolling pin and a lined baking sheet. A sharp knife and spatula can also be used to make the craft even easier.
Ingredients for Sourdough Salt Dough Ornaments
The ingredients to make sourdough salt dough ornaments are so simple! The two most important parts are the dough ingredients and the decoration / sealants. For a full list of ingredients, head to the recipe card below.
- Sourdough Salt Dough: Four ingredients make up this dough – sourdough starter, water, flour and salt. This is a great way to use up excess sourdough discard – with a whopping 1/2 cup of sourdough discard in this recipe. You can use active sourdough or sourdough discard within this recipe because it does not need to ferment or rise.
- Optional – Sealants or decorations: After you decorate your salt dough ornaments, it is important to seal them. Because this is not a recipe fit for human consumption – a glaze spray, glue or mod lodge can be used to protect the salt dough decorations.
How to Make Sourdough Salt Dough Ornaments
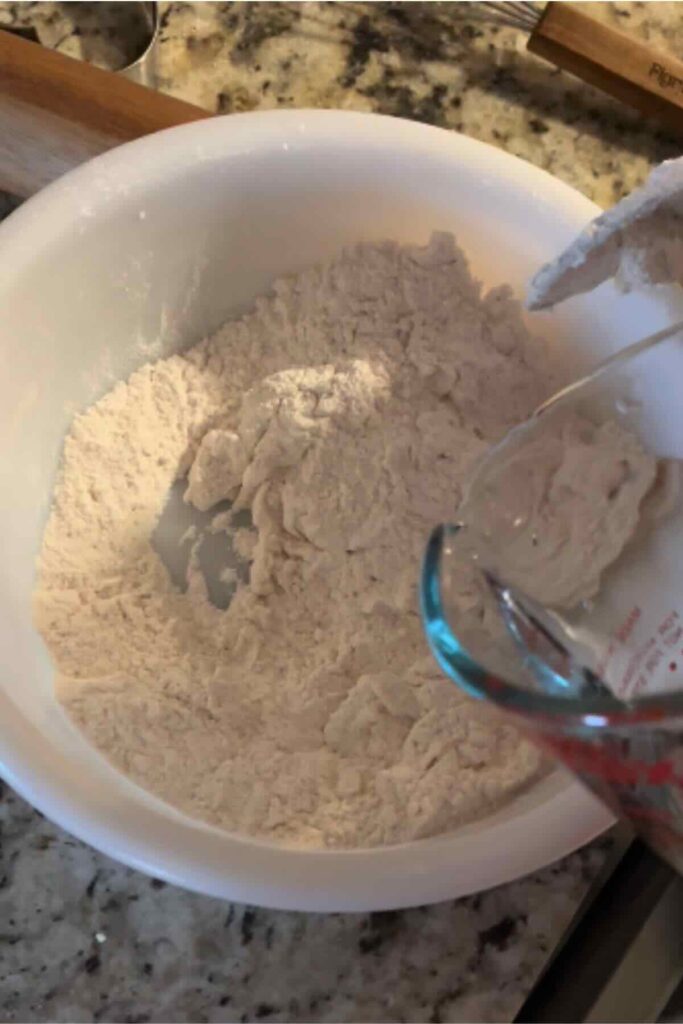
Step 1: Mix salt, flour and sourdough discard.
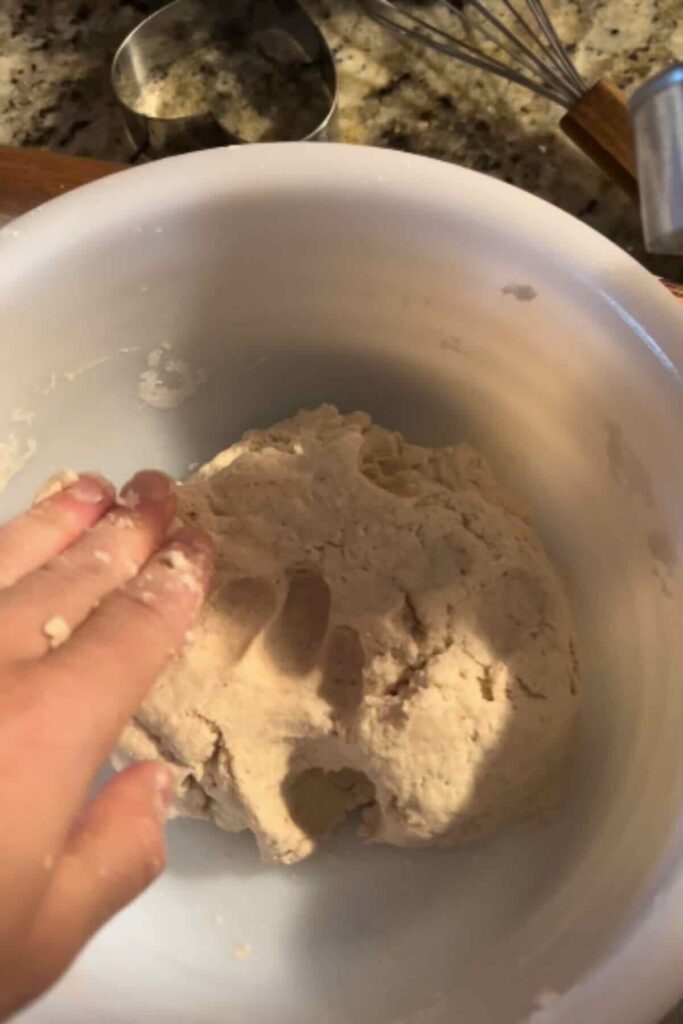
Step 2: Knead in water.

Step 3: Play with the dough!
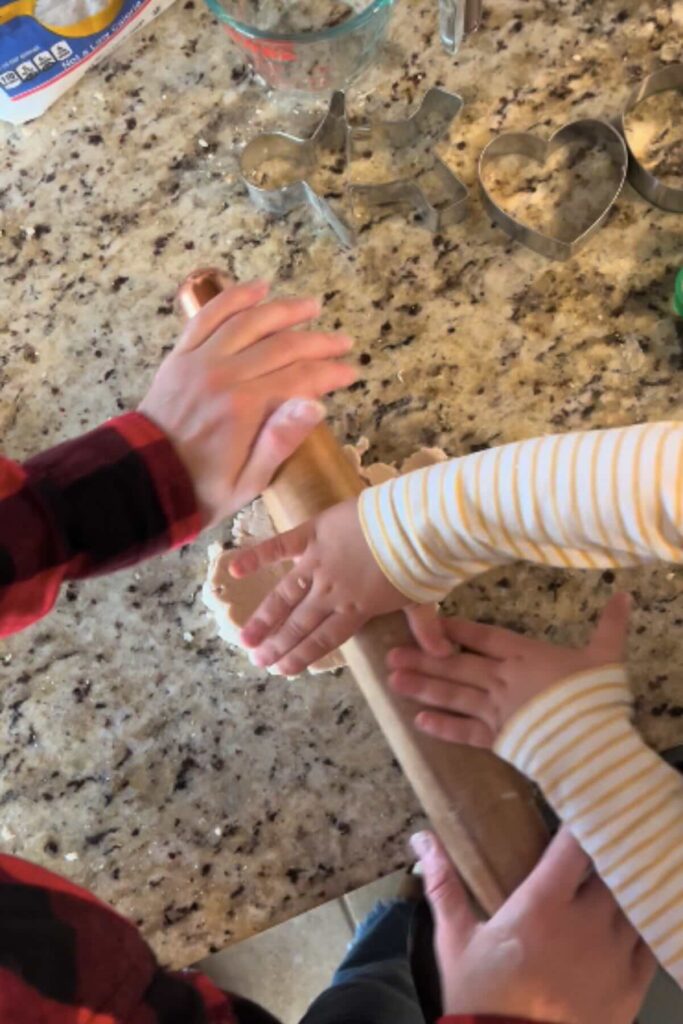
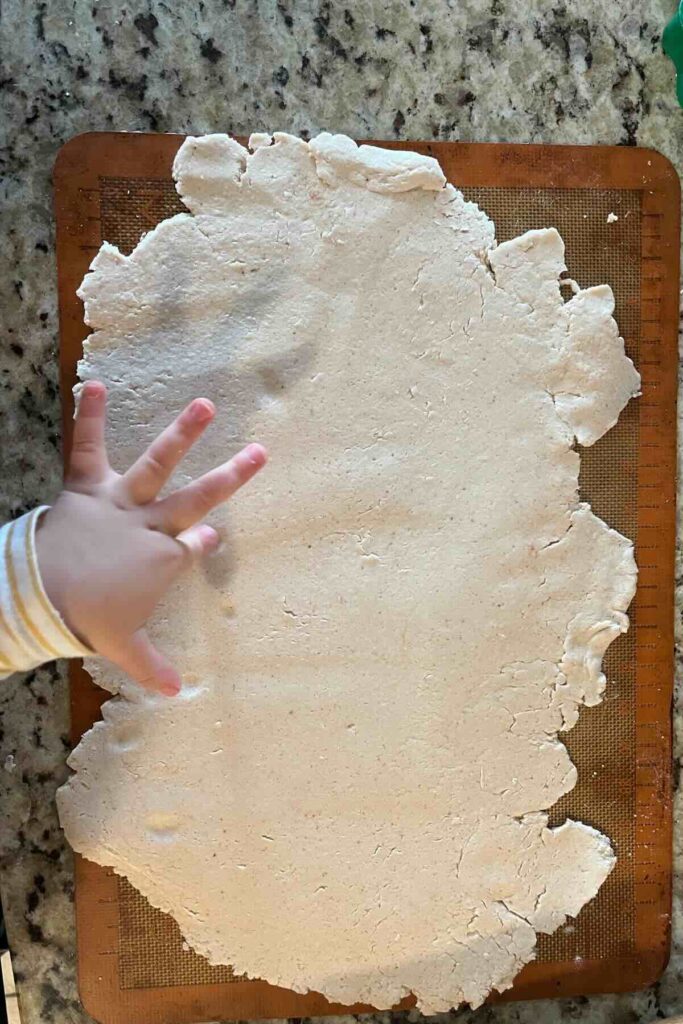
Step 4: Roll out dough.
Step 5: Cut into shapes / Stamp hands or feet. Add
Step 6 (optional): Poke holes (if presenting as ornament)
Step 7: Bake.
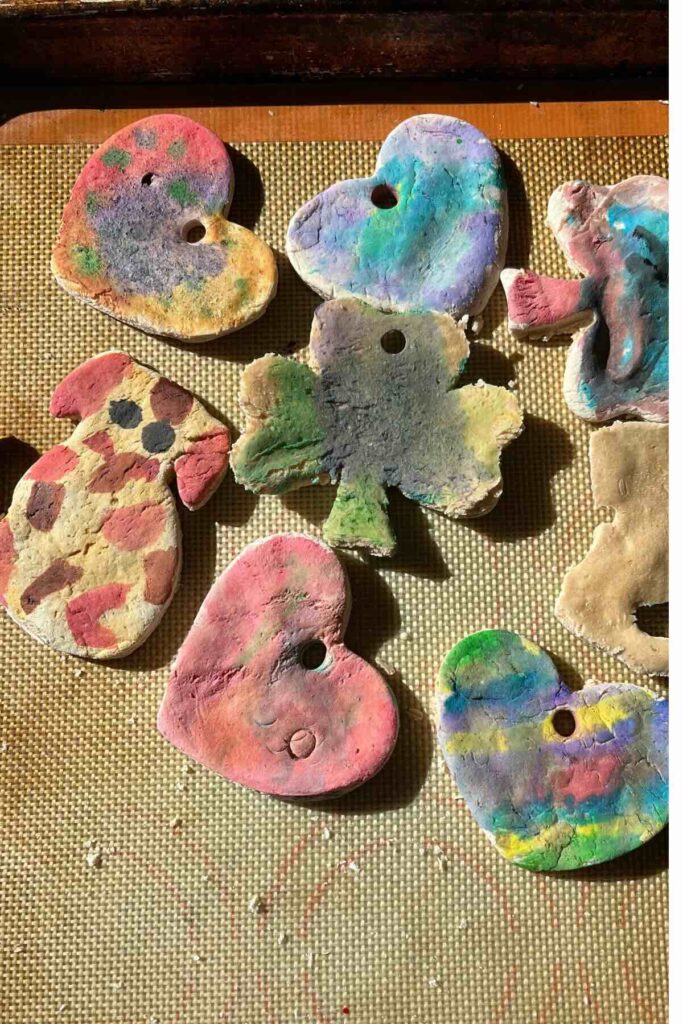
Step 8 (optional): Paint and coat with sealant.
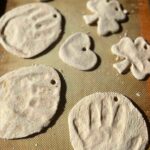
How to make a salt dough handprint ornament
To make a salt dough handprint ornament, place your hand onto the dough to leave an imprint. For those with toddlers, put a little pressure on each finger and hand to give an indentation within the dough.
Poke a hole at the top in the center of the dough with a straw. After the salt dough ornament has baked, add a ribbon and mark the name and date of your little one on the back. These are the perfect keepsake gift for grandparents!
How to make salt dough in advance
This salt dough can be made in advance. You can mix the ingredients and place them onto a ziplock bag or air tight container for up to 24 hours before using.
How to Preserve Salt Dough Ornaments
Once the sourdough salt dough ornaments have cooled completely, you can store them. It can be helpful to spray with spray sealer or coat with mod podge, ensuring both sides are covered.
As they are fragile, you can wrap them in bubble wrap, tissue paper or a towel before storing. If you wrap the ornaments in newspaper or a magazine, the ink may leak into the ornament. Consider using tissue paper. Store the handmade ornaments in a dry place.
Salt dough ornaments can last for years if preserved correctly and covered in varnish (sealer or mod podge). If not sealed, the ornaments could crumble within a year or two.
A note on air drying:
Air drying these sourdough salt dough ornaments does not work. Even after sitting out for a few days, certain spots do not dry completely.
To prevent mold I would not recommend letting them air dry, especially if you plan on storing these for years to come.
Frequently Asked Questions
Sourdough Salt Dough Ornaments
Equipment
- 1 Large Bowl
- 1 Baking Sheet
- 1 Rolling Pin
- 1 Spatula optional
- 1 Knife optional
- 1 Straw optional
- Cookie cutter, biscuit cutter, play dough cutters Anything you want to use to cut or shape the dough
Materials
- 1/2 Cup Sourdough Starter Active starter or sourdough discard both work
- 1-1/2 Cup Flour
- 1/2 Cup Salt Kosher salt, Table Salt, Himalayan Sea Salt
- 3/4 Cup Water +/- (See notes)
Decorations (Optional – Use any)
- Color / Paint
- Glitter
- Ribbon
- Stamps / Cookie Cutter
Sealants (Optional – Use one)
- Clear Glue
- Mod Podge
- Clear Sealant
Instructions
Mixing and shaping
- To begin, mix the salt and flour together. Add in the sourdough discard.
- Finally, add in the water, starting with 3/4 cup. Mix together with a wooden spoon until it is too hard to stir, then knead with your hands.*The water ratio can be adjusted based and will be impacted by how hydrated your sourdough starter is. See notes for more details.
- Combine the dough by hand, kneading (aka playing with) the dough for as long as you like. Once the dough comes together, use a rolling pin to flatten.Option to add a light layer of extra flour to the counter if the dough is too sticky.
- Roll the dough 1/8-1/4 inch thin.If your dough is sticking to the rolling pin, run it under water or place the salt dough between two pieces of parchment paper.
- Use cookie cutters, a biscuit cutter, or hands to make shapes in the dough. Use hands, feet, cookie stamps or other materials to leave imprints on the dough.We have used leaves and pine needles for fun patterns.
- As the shapes are made, remove any excess dough from around the cuttings to keep their shape.Gather the remaining dough together and roll out to use again.
- If you are planning on hanging the ornaments, poke a hole in the top (or center) of the ornament. We used a straw, though you could use a knife to create a hole shape.
Baking
- Preheat the oven temperature to 250 degrees Fahrenheit. Place the salt dough ornaments on a parchment lined / silicone baking mat on a cookie sheet. Ensure there is space between the ornaments so they do not touch.
- Bake the ornaments for 90 minutes to three hours total. After cooking for 90 minutes, check on the ornaments every 20 minutes. When cooked, the salt dough should be hard to the touch.
- Allow to cool at room temperature until cold. Once cooled, decorate and allow them to dry again.
Decorate and Seal
- At this point you can also decorate before sealing. If painting – be sure to allow them to dry completely.Option to put a date on the back with a fine point Sharpie if you want to remember the year the ornament was made.Finally, seal them with a sealant (mod podge glue, or spray sealant) to ensure they will not crack. If gifting to have someone hand the ornament, consider tying ribbon on the hole.Seal with one of the following: mod podge, clear sealant spray or clear glue.
Video
Notes
- If your starter is thick as opposed to runny, you may need more water. The opposite is true if your starter is hungry or runny.
- If you find the mixture is too sticky, add more flour. If it is too dry, add more liquid one tablespoon at a time.
- Should the dough look like the surface is showing cracks, wet your finger with warm water and smooth it out. As the dough dries, it may begin to look cracked.
- If hanging the ornament, tie string or pretty ribbon in the hole.
- It is easy to decorate the salt dough ornaments. Decorate by coloring on them with acrylic paint, water color paint or sparkles. It can be fun to use hot glue and paste items to the ornaments, like pine needles or dried flowers.
- Once the sourdough salt dough ornaments have cooled completely, you can store them. It can be helpful to spray with spray sealer or coat with mod podge, ensuring both sides are covered.
- As they are fragile, you can wrap them in bubble wrap, tissue paper or a towel before storing. If you use newspaper or a magazine to provide protection, the ink may leak into the ornament. Consider using tissue paper instead. Store the handmade ornaments in a dry place.
- Salt dough ornaments can last for years if preserved correctly and covered in varnish (sealer or mod podge). If not sealed, they will likely crumble within a year or two.

What is your favorite shape of salt dough ornament to make? We love making circles with handprints in the middle. It is an easy way to see growth over the years! Let us know in the comments below!