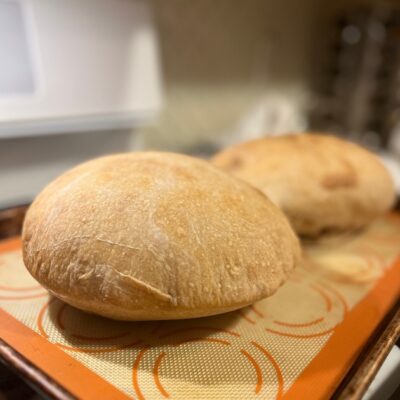
Aldi Sourdough Bread Copycat Recipe
This sourdough bread recipe has the benefits of fermentation without the addition of whole wheat flour. Combining bread flour and all purpose flour, this loaf will convert anyone to eat sourdough bread!
Equipment
- 2 mixing bowl
- 1 Sheet Pan
Ingredients
- 10 ounces Bread Flour
- 23.4 ounces All Purpose Flour
- 23 ounces Water
- 7 ounces Sourdough Starter At mature / peak Hydration
- 0.7 ounces Salt Kosher, Sea Salt or Himalayan Sea Salt
Instructions
Autolayse and Mixing dough
- In a large bowl, mix together flour and water. Allow to sit for 30 minutes (autolayse).
- To the flour and water mixture, add sourdough starter and salt. Knead until salt is dispersed throughout dough and is not felt while kneading. This process can take anywhere from 4-8 minutes. Cover with a rung out tea towel or cloth. Allow to rest in 15 minutes.
Stretch and Folds
- After 15 minutes, remove tea towel or cloth from bowl. Stretch and fold four times. Place tea towel or cloth on top of bowl. Allow to rest for 15 more minutes. Repeat the stretch and fold process once more and allow to rest for 30 minutes.After 30 minutes, remove cloth from dough. Stretch and fold four times. Allow to rest for 30 minutes. Repeat stretch and fold process once more. Place run and allow to rest for bulk fermentation on countertop.The stretch and fold process will be in the following increments (minutes):15-15-30-30
Bulk Fermentation (Countertop)
- Allow to ferment in the large bowl on the countertop until dough has doubled in size. This can take anywhere from 6 hours to 18 hours depending on the temperature of your home.
Cut, Shape and Bulk Ferment (Fridge)
- After the dough has doubled in size, remove from the bowl and place on the countertop. Cut the dough into two, taking care not to pop too many bubbles! Shape the dough by pulling towards you and tucking the edges. This will create a circular loaf. Line two bowls with a dry tea towel or cloth. Lightly flour the surface and place one loaf in each bowl. Wrap dough with towel or cloth and cover. Place within the refrigerator for up to 48 hours.See notes on bulk fermentation time in fridge.
Baking
- Preheat oven to 425 degrees. Line a baking sheet with parchment paper or a silicone baking sheet. Remove loaves from fridge immediately prior to baking. Place on parchment paper or silicone baking sheet and cook for 30-45 minutes. Crust will become golden brown and loaves will be firm to the touch.Ensure the bread reaches an internal temperature of 190 - 200 degrees to be cooked through. As the bread cools, the crust will become less firm.Allow to cool on countertop before cutting. Place cut loaf on cut side down to store, or slice and place in the fridge / freezer for long term storage. If storing on counter, store in a bread bag or plastic bag with corner cracked.Bread will last for up to 1 week on the counter or 3 months in the freezer.
Notes
*Some readers have noted the bread spreads a lot when baked. If this is the case, reduce the overall hydration of the loaf. I have had success in reducing the hydration from 23 ounces of water to as low as 18 ounces of water.
-The longer bulk fermentation time in the fridge, the more pronounced 'sour' flavor the dough will have.
-The loaf can sit within the fridge for as short as 12 hours for a bulk fermentation period before being cooked.
-For those with a gluten intolerance, consider allowing the dough to sit within the fridge for a longer period of time. A longer bulk fermentation period within the fridge will reduce the amount of gluten present and allow for easier digestion. This does not make the bread 'gluten free', though those with an intolerance may be able to consume sourdough bread with a reduced reaction than a non-long fermented bread containing wheat.
Tried this recipe?Let us know how it was!